Ansible ကို လေ့လာလျှင် ကျွန်တော်တို့ hands-on လုပ်ပြီးလေ့လာတာပိုကောင်းပါတယ်. Ansible hands-on lab ကို overhead နည်းနည်းနဲ့ လုပ်လို့ရပါတယ်. VM or Cloud ကိုယ်ကြိုက်ရာမှာ deploy လုပ်လို့ရပါတယ်.
ကျွန်တော်တို့ အရင် ဆုံး High Level Design ကို အရင်ကြည့်ရအောင်.
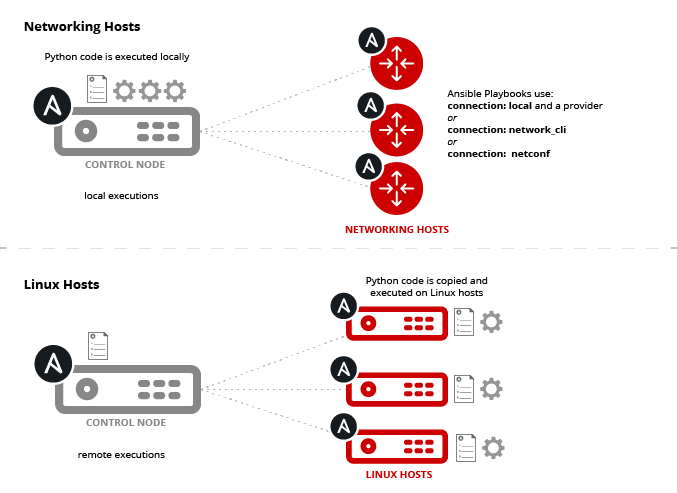
ကျွန်တော်က hands-on lab ကို Linux Hosts အတွက် လုပ်ထားပါတယ်, တစ်ကယ်လို့ Networking Hosts အတွက်ဆိုရင် GNS3 ကိုသုံးလို့ရပါတယ်.
Linux Hosts အတွက် Minimum RAM 2GB, vCPU 2 Core လောက်ဆိုရင် ရပါတယ်. Hands-on Lab အတွက်ပါ. တစ်ကယ်လို့ work use casesအတွက်ဆိုရင် Resources များတာပိုကောင်းပါတယ်.
*Prerequisites*
- Linux Hosts for Control and Managed Nodes
- Ansible package, python binary, and library
- Dedicated user for Ansible Lab
- SSH Passwordless Authentication and sudoer file
- Test Automation between Control and Managed Hosts
- Micorsoft VSCode and Extension
*Linux Hosts for Control and Managed Nodes*
Linux Hosts အတွက် ubuntu ကို သုံးထားပါတယ်.Hands-on Lab အတွက် Internet လဲလိုပါတယ်, တစ်ကယ်လို့ Red Hat နဲ့ Internet မလိုတဲ့ Local Repo အတွက်ဆိုရင် ကျွန်တော် အရင်က share ထားတဲ့ post တစ်ခုရှိပါတယ်.
Control Node အတွက် RAM 2 GB နဲ့ Managed Node အတွက် RAM 1 GB သုံးထားပါတယ်. ကိုယ်ကြိုက်ရာ Virtualization ပေါ်မှာ deploy လုပ်ပါ. ကျွန်တော်က KVM ကို သုံးထားပါတယ်.
control and managed hosts တွေရဲ့ /etc/hosts file မှာ hosts တွေရဲ IP and FQDN မှတ်ထားပါ.
vim /etc/hosts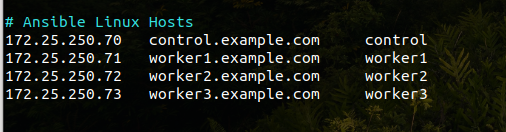
*Ansible package, python Binary,and Library*
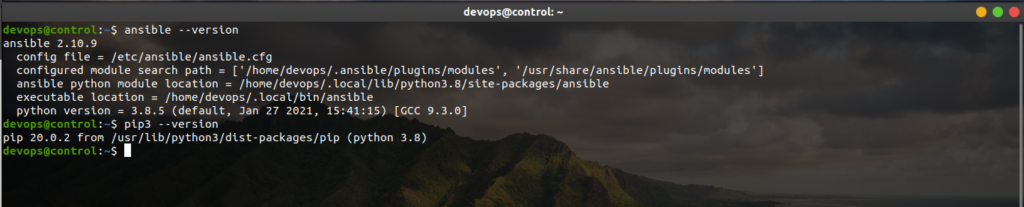
Control node မှာ update လုပ်ပါ. Ansible Repository ကို ubuntu repo ထဲ ထည့်ပါ,ပြီးရင် Ansible package နဲ့ လိုအပ်တဲ့ python Binaryကို install လုပ်ပါ.
 sudo apt update
 sudo apt full-upgrade
 sudo apt install python3-pip python2
 sudo apt install software-properties-common
 sudo apt-add-repository --yes --update ppa:ansible/ansible
 sudo apt install ansible
Ansible ကို python pip နဲလဲ install လုပ်လို့ရပါတယ်. ဒါပေမဲ့ pip ကိုသုံးပြီး Ansible ကို Install လုပ်ရင် /etc/ansible/ansible.cfg file မပါပါဘူး. Ansiible ကို စလေ့လာသူ တွေအတွက်က ansible.cfg မှာပါတာတွေက အရေးကြီးပါတယ်.
pip3 install --user ansible
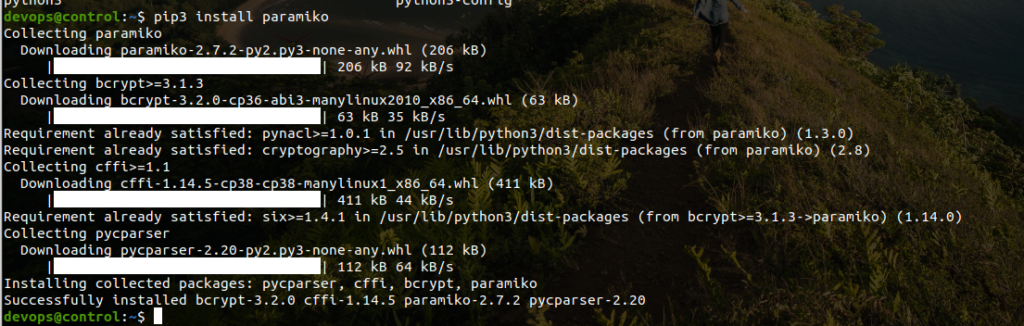
pip3 install --user paramiko ( python library for SSH v2 )

python paramiko library ကို install မလုပ်ချင်လဲရပါတယ်. Ansible Control node နဲ့ Managed node connection ကို SSH မသုံးချင်ရင် paramiko connection plugin ကို သုံးလို့ရပါတယ်.
https://docs.ansible.com/ansible/2.9/plugins/connection/paramiko_ssh.html#paramiko-ssh-connection
python 2 ကိုလဲ install လုပ်ပါ. Ansible Modules တစ်ချို့က python 2 လိုပါတယ်.

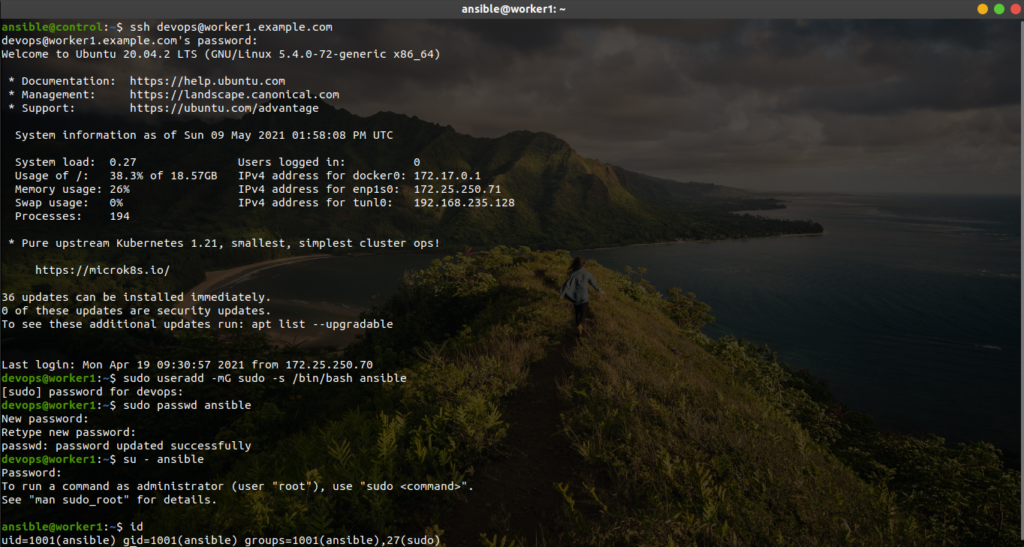
*Dedicated user for Ansible Lab*
Ansible Hands-on Lab အတွက် user account တစ်ခု create လုပ်ပါ. Root account ကို သုံးလဲရပါတယ်. Normal Account ကို Admin privileged နဲ့သုံးတာ ကောင်းပါတယ်.
ansible နံမည် နဲ့ user account တစ်ခု create လုပ်ပါ. sudo group ထဲကို ထည့်ပါ. ansible user ကို control and managed host များမှာ create လုပ်ပါ.
 sudo useradd -mG sudo -s /bin/bash ansible
 sudo passwd ansible
 su - ansible
id 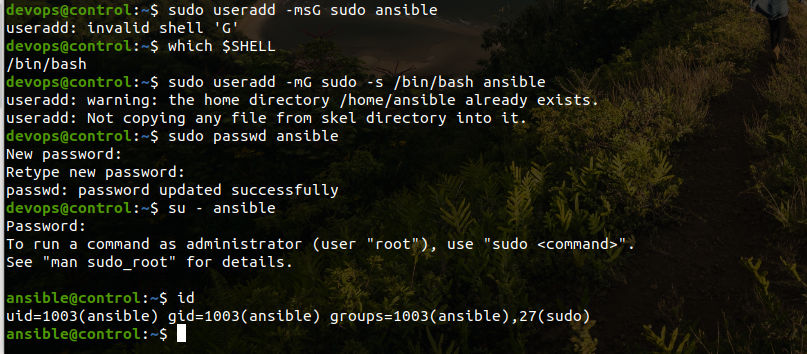

*SSH Passwordless Authentication and sudoer file*
ssh passwordless authentication အတွက် ssh key-pair တစ်ခုကို create လုပ်ပါ.
ssh-keygen
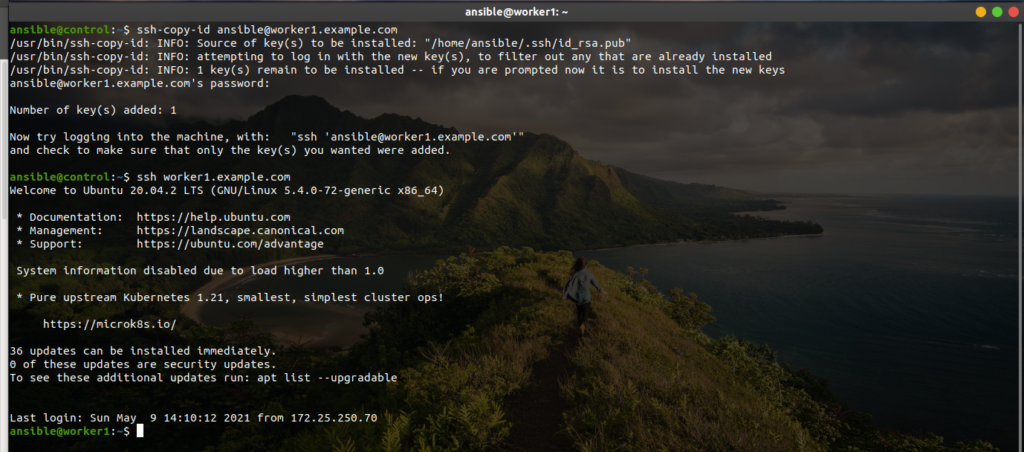
ssh passwordless authentication အတွက် ssh key pair ကို managed host စီ copy လုပ်ပါ.
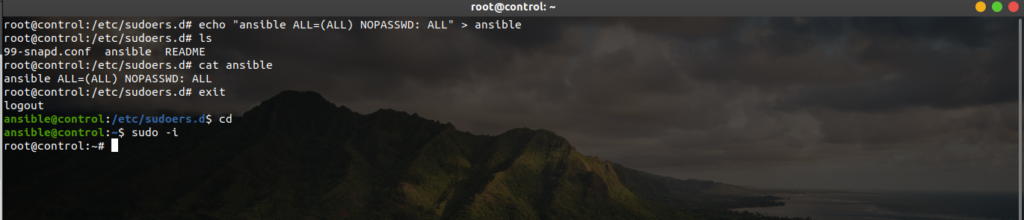
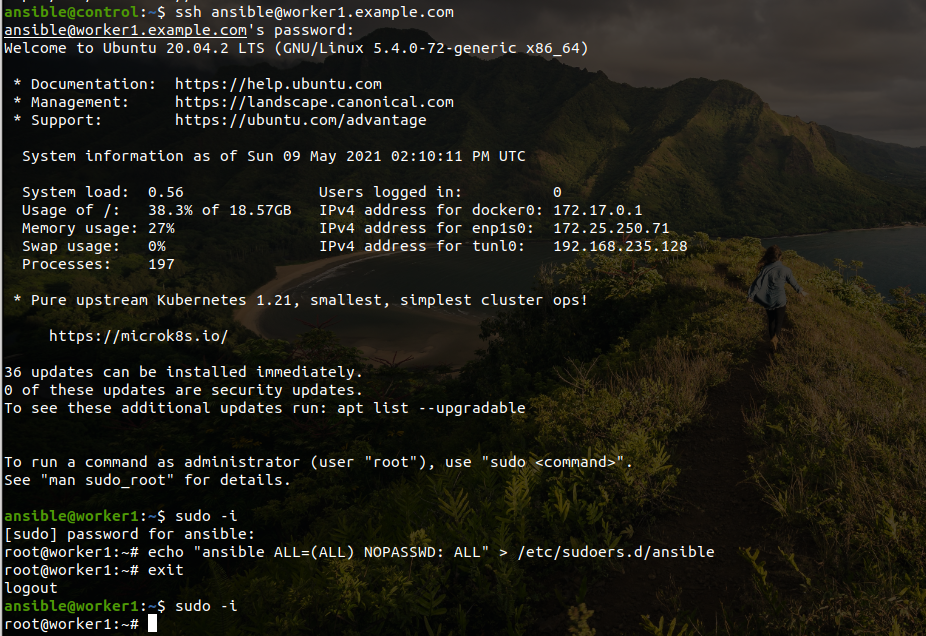
ansible user ကို sudoer file ထဲထည့်ပါ. sudo privilege ခေါ်သုံးရင် password မလိုအောင်ပါ. root user ကိုသုံးပြီး create လုပ်ပါ.
 cd /etc/sudoers.d/
 echo "ansible ALL=(ALL) NOPASSWD : ALL" > ansible
 ls -l
sudoers file ကို check လုပ်ပါ.
sudo -ipassword မရိုက် ရတော့ ရင် အဆင်ပြေပါပြီး.
Managed လုပ်မဲ့ Linux Hosts များမှာလဲ ansible နံမည်နဲ့ user account create လုပ်ပါ.
control node မှာ create လုပ်ထားတဲ့ sudoer file ကို managed node စီကို copy ကူးပါ, ဒါမှမဟုတ် ရင် managed node မှာ create လုပ်ပါ.
managed host သုံးလုံးရှိရင် သုံးလုံး လုံးမှာ ssh key pair, sudoer file ကို copy လုပ်ပါ.
managed host ရဲ့ sudo privilege ကို control node ကနေ test လုပ်ကြည့်ပါ.
ssh [email protected] "sudo apt update"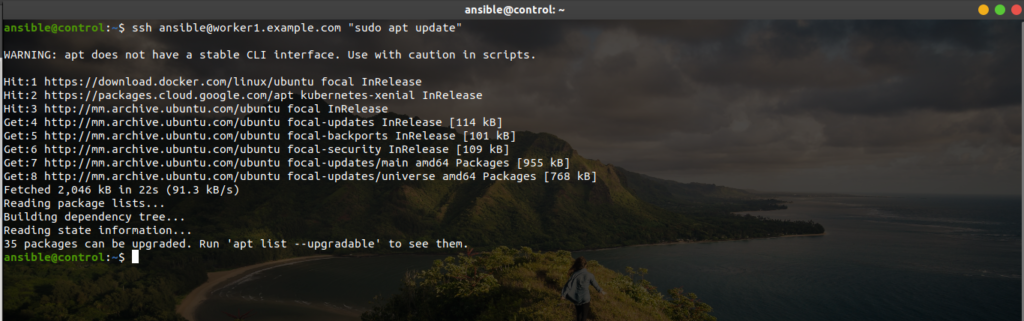
*Test Automation between Control and Managed Hosts*
Managed Hosts တွေကို Control host ကနေ Ansible နဲ့ Automation test လုပ်ကြည့်ပါ.
ansible ad-hoc command ကို သုံးပြီးစမ်းကြည့်ပါ.
အရင်ဆုံး ansible.cfg နဲ့ inventory file ကို project တစ်ခုစီးအတွက် create လုပ်ပါ.
တစ်ကယ်လို့ ansible.cfg file ကို project directory မှာ create မလုပ်ရင် /etc/ansible/ansible.cfg file ကို default အနေနဲ့ သုံးပါတယ်.
mkdir test
vim inventory
vim ansible.cfg
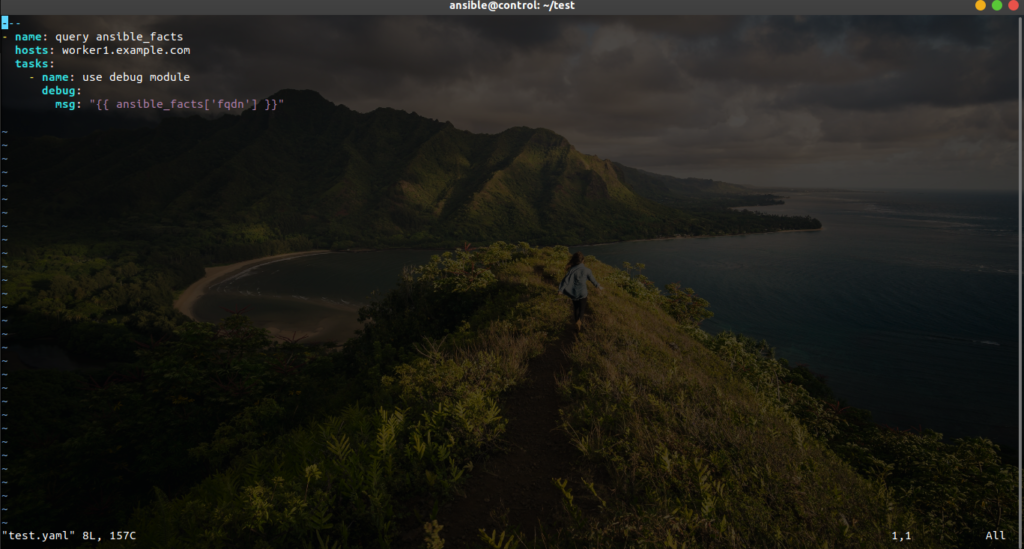
vim test.yamlYAML File ကို ရေးဖို့ကျွန်တော်တို့ VIM Editor ကို သုံးလို့ရပါတယ်. vimrc file ကို user home directory မှာ create လုပ်ပါ.
YAML က code indentation အတွက် space character ကိုသုံးပါတယ်. vimrc file မှာ 1 tab = 2 space အနေနဲ့ ပြောင်းလို့ရပါတယ်.
echo "autocmd FileType yaml setlocal ai ts=2 sw=2 et" > ~/.vimrc
vimrc file meaning
- shiftwidth: sw
- tabstop: ts
- expandtab: et
ansible.cfg file
ansible.cfg file ကို /etc/ansible/ansible.cfg file ကို နမူနာ သုံးလို့ ရပါတယ်. ကိုယ်သုံးချင်တဲ့ project ပေါ်မူတည်ပြီး ansible.cfg ကို ပြင်ဆင်လို့ရပါတယ်. control host မှာဘဲ create လုပ်ဖို့လိုပါတယ်.

ansible.cfg အတွက် document ကို အောက်ပါ link မှာ ကြည့်ပါ.
https://docs.ansible.com/ansible/latest/reference_appendices/config.html
inventory file
inventory file ကို ကိုယ် managed လုပ်ချင်တဲ့ hosts တွေရဲ့ fqdn,ip, variables တွေကို မှတ်တဲနေရာမှာသုံးပါတယ်.
ini or yaml format ကိုသုံးလို့ရပါတယ်.

ansible playbook
ansible plabook တစ်ခုကို VIM ဒါမှမဟုတ် ကိုယ်ကြိုက်ရာ IDE ကိုသုံးပြီး create လုပ်ပါ.
ansible ad-hoc test
ansible ad-hoc command ကို single task တစ်ခုကို automate လုပ်ရာမှာသုံးပါတယ်.
ansible ad-hoc command document ကို အောက်ပါ link မှာကြည့်ပါ.
https://docs.ansible.com/ansible/latest/user_guide/intro_adhoc.html
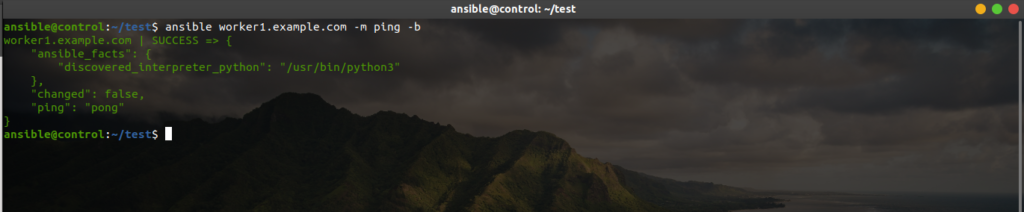
ansible ping module ” -m ping” နဲ့ worker1.example.com ကို test လုပ်ထာ.ပါတယ်. – b က privilege escalation ကို test လုပ်တာပါ.
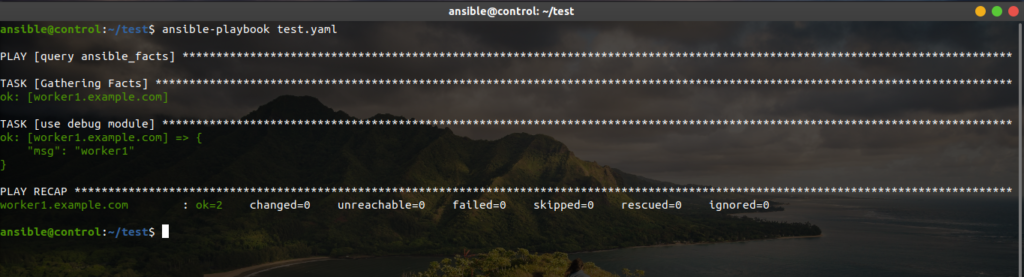
ansible-playbook test
ansible-playbook နဲ့ managed host ကို automate လုပ်ကြည့်ပါ.
ansible playbook နဲ့ complex ဖြစ်တဲ့ tasks တွေကို automate လုပ်လို့ရပါတယ်.
ansible playbook docs ကို အောက်ပါ link မှာ ကြည့်ပါ.
https://docs.ansible.com/ansible/latest/user_guide/playbooks_intro.html
*Micorsoft VSCode and Extension*
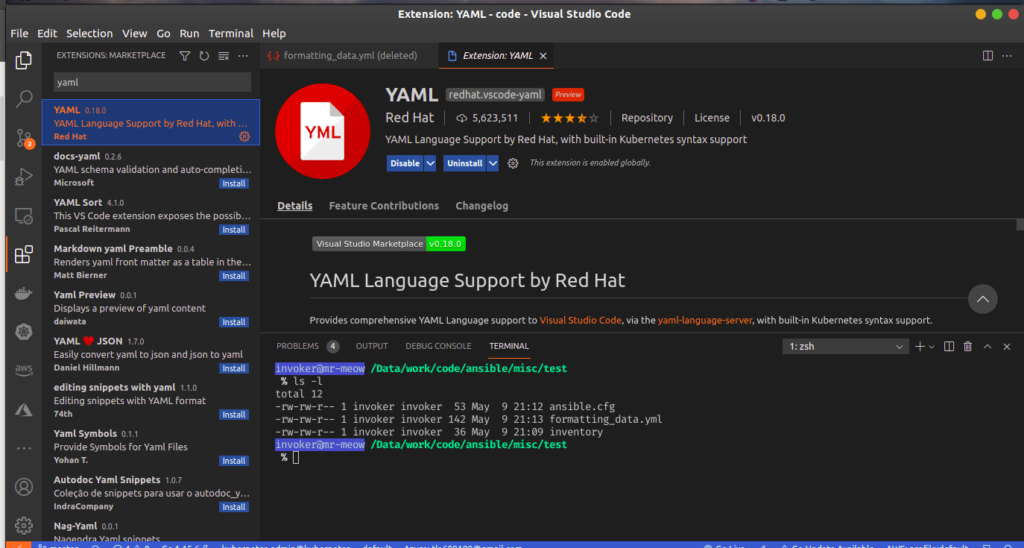
ansible ကို Microsoft VSCode နဲ့ တွဲသုံးလို့ရပါတယ်. control host မှာ Microsoft VSCode ကို Install လုပ်ပါ.
Hands-on lab အတွက် dedicated user, ssh key pair, ansible binary တို့ကို physical host မှာ create လုပ်ပါ. အပေါ်မှာ create လုပ်ခဲ့တဲ့ steps တွေအတိုင်လုပ်ပါ.
ansible အတွက် လိုအပ်တဲ့ VSCode Extension တွေကို install လုပ်ပါ.
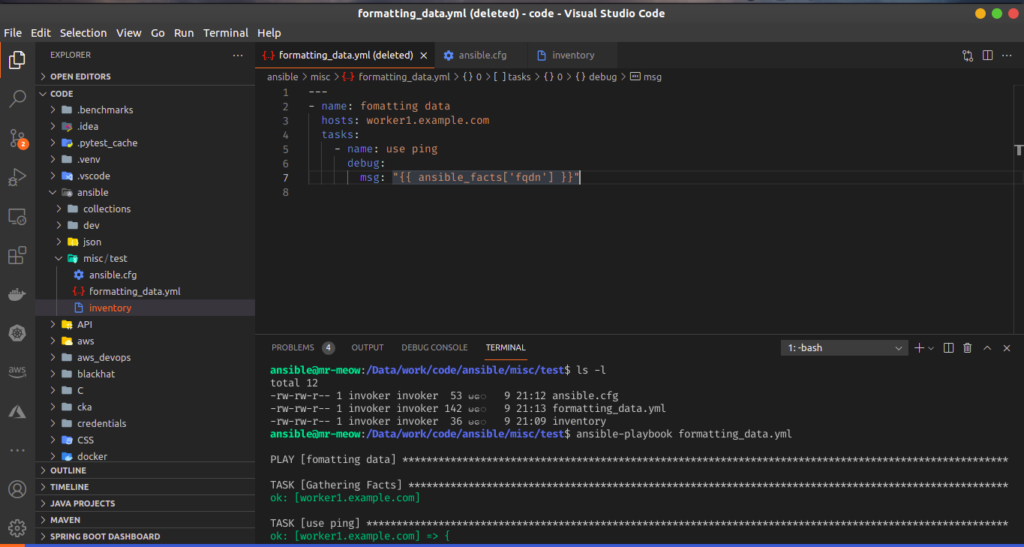
dedicated user, ssh key pair, ansible binary တို့ကို create လုပ်ပြီးရင် MS VSCode က ansible playbook ကို test လုပ်ကြည့်ပါ.
ansible ကို ဆက်လေ့လာလိုလျှင်.
https://www.jeffgeerling.com/blog/2020/ansible-101-jeff-geerling-youtube-streaming-series