ကျွန်တော် AWS ရဲ့ service တစ်ခုအကြောင်းကို sharing လုပ်ချင်ပါတယ်. ကျွန်တော်တို့ AWS မှာ services တွေကများပါတယ်.ကျွန်တော် sharing လုပ်ချင်တဲ့ AWS Service က AWS Cloud9 အကြောင်းပါ. ကျွန်တော်တို့ AWS Cloud9 service ကို သုံးပြီး Development Environment တစ်ခုကို AWS ပေါ်မှာတည်ဆောက်လို့ရပါတယ်.
ကျွန်တော်တို့ AWS မှာ cloud9 IDE တစ်ခုကို တည်ဆောက်ထားရင် ကျွန်တော်တို့လုပ်နေတဲ့ AWS projects တွေကို manage လုပ်ရတာပိုအဆင်ပြေပါတယ်. AWS Cloud9 ကို full IDE အနေနဲ့သုံးရတာလဲအဆင်ပြေပါတယ်.AWS Cloud9 ကိုသုံးပြီး Team collaboration projects တွေကိုလဲတည်ဆောက်လို့ရပါတယ်.
ကျွန်တော်တို့ AWS Cloud9 ကိုသုံးပြီး DevOps Culture ကို AWS Cloud ပေါ်မှာ Deploy လုပ်ရတာအဆင်ပြေပါတယ်.
AWS Cloud9 Service က AWS users တွေအတွက်တော်တော်အသုံးဝင်ပါတယ်.
AWS Cloud9 ကိုသုံးပြီး လုပ်လို့ရတာတွေကိုအောက်ပါ link မှာကြည့်ပါ.
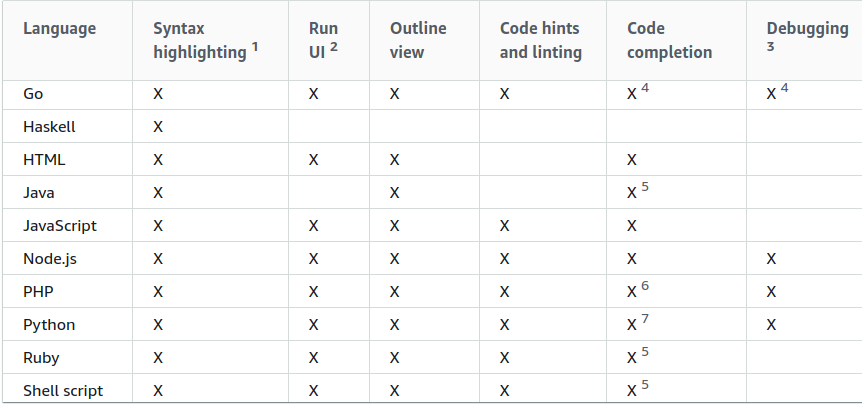
AWS Cloud9 က support လုပ်ထားတဲ့ programming languages တွေကများပါတယ်.
Prerequisites
- aws iam user
- aws programmatic access
- aws ec2 instance profile
ကျွန်တော်တို့ AWS Cloud9 Service ကိုစမ်းကြည့်ရအောင်. ကျွန်တော် AWS Cloud9 ကိုမသုံးခင်မှာ Cloud9 IDE ကို create လုပ်မဲ့ AWS User ( root or IAM user ) ကိုအရင်သက်မှတ်ထားဖို့လိုပါတယ်.
AWS Resources တွေကို cloud9 နဲ့ manage လုပ်ဖို့က IAM permissions တွေလိုပါတယ်.
တစ်ကယ်လို့ IAM user ကို မသုံးချင်ရင် EC2 instance profile ကိုသုံးလဲရပါတယ်.
AWS Cloud9 က default အနေနဲ့ EC2 instance ပေါ်မှာ တည်ဆောက်ထားတာပါ, ရှိပြီးတာ linux instance ပေါ်မှာလဲ create လုပ်လို့ရပါတယ်.
AWS Cloud9 က default အနေနဲ့ AWS က managed လုပ်တဲ့ temporary credentials ကိုသုံးပါတယ်.
ကျွန်တော်က IAM user and EC2 instance profile ကိုသုံးထားပါတယ်. IAM user and EC2 instance profile က cloud9 IDE အတွက်ပါ.
ကျွန်တော် တို့ multiple AWS projects တွေကို manage လုပ်ချင်ရင်တော့ AWS CLI မှာ profile ခွဲပြီး manage လုပ်တာပိုအဆင်ပြေပါတယ်.
ကျွန်တော်တို့ Dev environment အတွက် aws cli profile တစ်ခု, Prod အတွက် profile တစ်ခုခွဲပြီး manage လုပ်တာပိုအဆင်ပြေပါတယ်.
ကျွန်တော်တို့ Cloud9 အတွက် IAM user ကို create လုပ်ကြည့်ရအောင်.
IAM User
AWS Console ကို အောက်ပါ link ကဝင်ပါ.
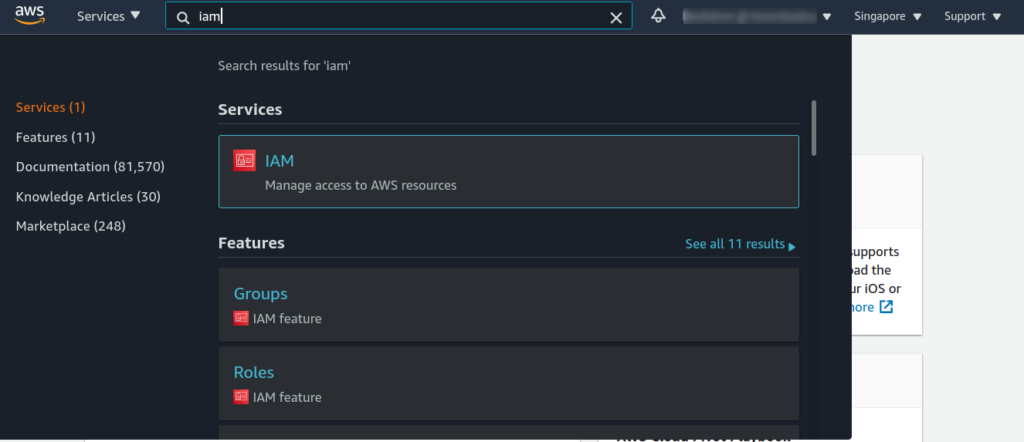
AWS Console မှာ IAM service ကိုရွေးပါ.
IAM user account တစ်ခုကို create လုပ်ပါ.
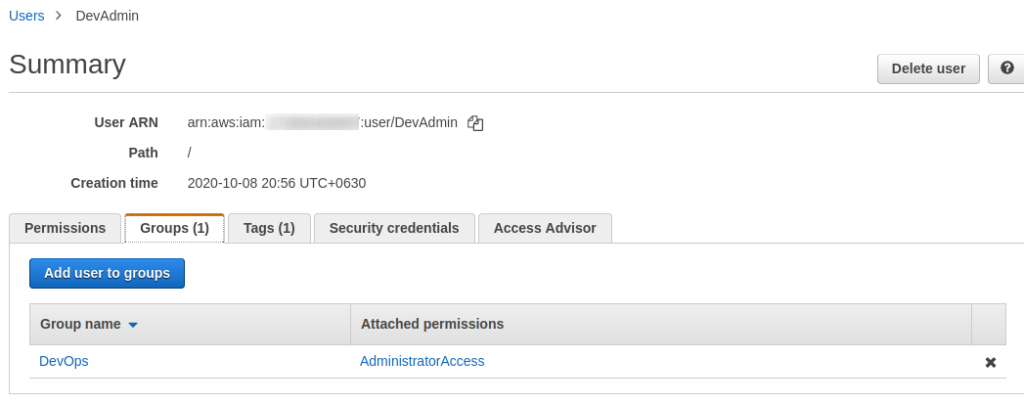
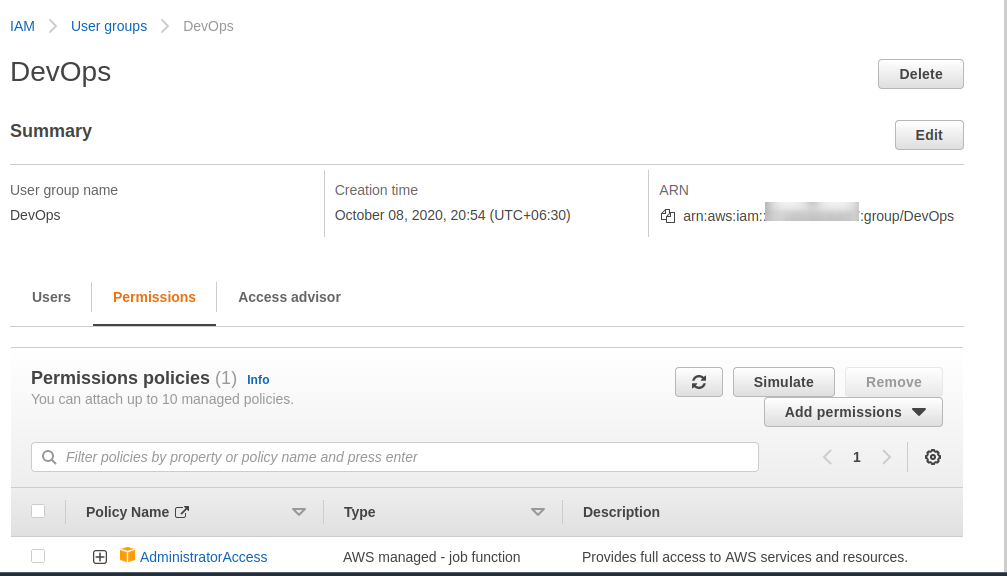
ကျွန်တော်က DevAdmin ဆိုတဲ့ IAM user account ကို create လုပ်ထားပါတယ်. DevAdmin user ကို DevOps group ထဲမှာထည့်ထားပါတယ်. DevOps group မှာ Administrator access policy ကို attach လုပ်ထားပါတယ်.
IAM user programmatic access
IAM user အတွက် programmatic access key ထုတ်တာနဲ့ပါက်သတ်ပြီး ကျွန်တော်အရင်က sharing လုပ်ထားတာရှိပါတယ်. အောက်ပါ link မှာကြည့်ပါ.
ကျွန်တော်တို့ EC2 instance profile တစ်ခုကို create လုပ်ပါမယ်. EC2 instance profile ကိုမသုံးလဲရပါတယ်.
IAM user မှာ Administrator access (or) least privilege access ( manage လုပ်မဲ့ resources တွေရဲ့လိုအပ်သလောက် permissions ) တွေကို သက်မှတ်ထားရင် အဆင်ပြေပါပြီး.
EC2 Instance Profile
EC2 instance profile ကို IAM service ရဲ့ roles မှာ create လုပ်ပါ.
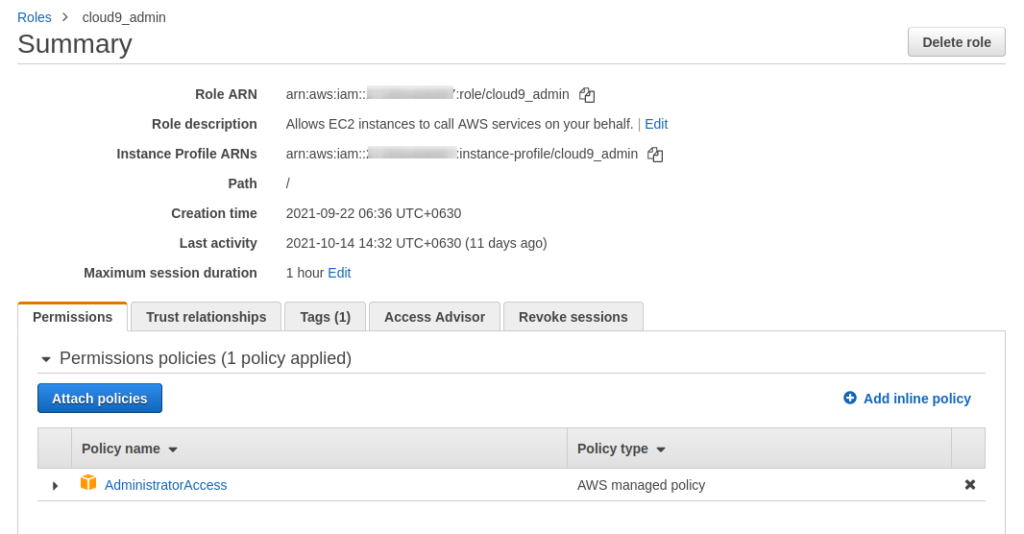
ကျွန်တော်က cloud9_admin ဆိုတဲ့ role ကို create လုပ်ထားပြီး administrator access policy ကို attach လုပ်ထားပါတယ်.
ကျွန်တော်တို့ လိုအပ်တာတွေကိုပြင်ဆင်ပြီးရင် Cloud9 Service ကို သုံးကြည့်ရအောင်.
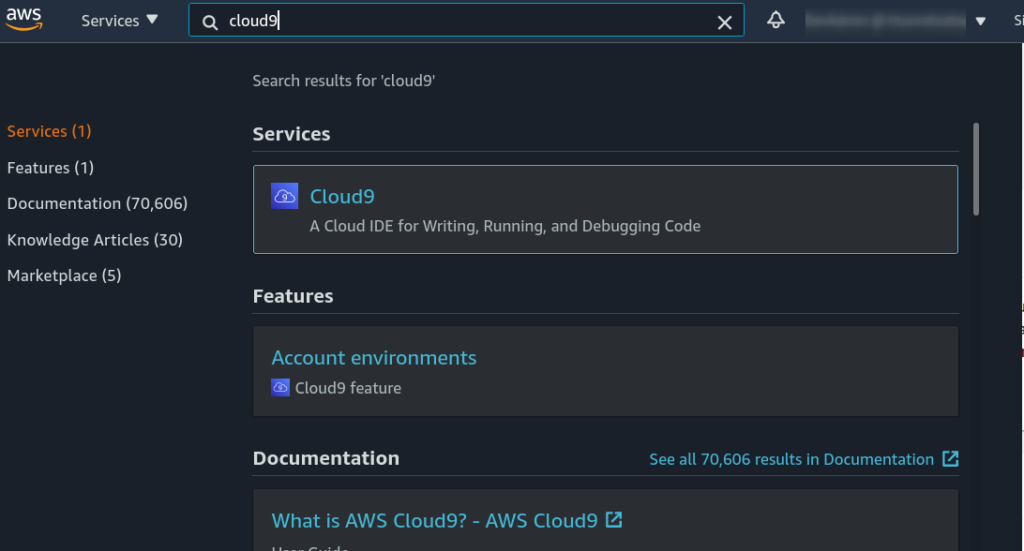
ကျွန်တော်တို့ AWS Console မှာ Cloud9 service ကိုရွေးပါ.
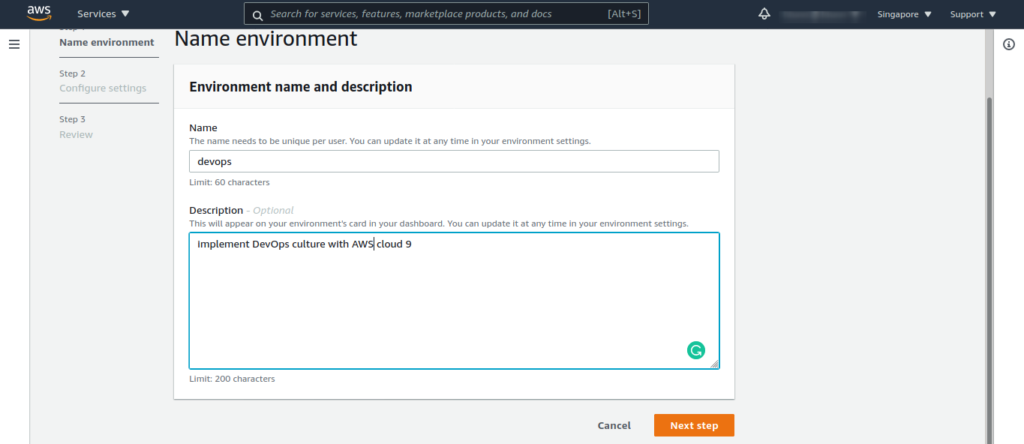
ကျွန်တော်တို့ cloud9 service မှာ environment တစ်ခု create လုပ်ကြည့်ရအောင်.

ကျွန်တော်တို့ create လုပ်မဲ့ cloud9 environment ကိုကိုယ်ကြိုက်သလို သက်မှတ်ပါ.
AWS cloud9 က default အနေနဲ့ EC2 instance ပေါ်မှာ တည်ဆောက်ထားတာပါ, ကျွန်တော်တို့ရဲ့လိုအပ်ချက်ပေါ်မူတည်ပြီး EC2 instance type ကိုရွေးပါ. ကျွန်တော်က aws free tier eligible ဖြစ်တဲ့ t2.micro ( instance type ) ကိုသုံးထားပါတယ်.
ကိုယ်ကြိုက်ရာ linux distro ( ubuntu or amazon linux ) ကိုလဲရွေးလို့ရပါတယ်.
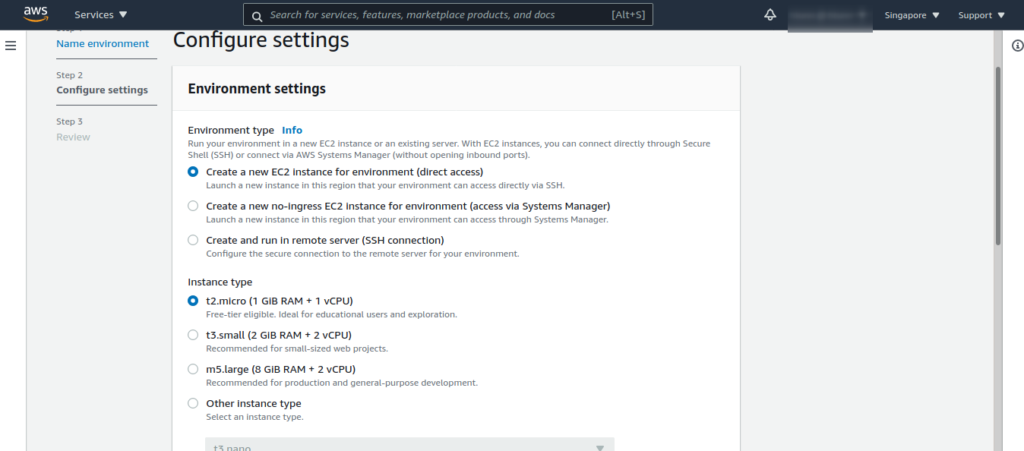
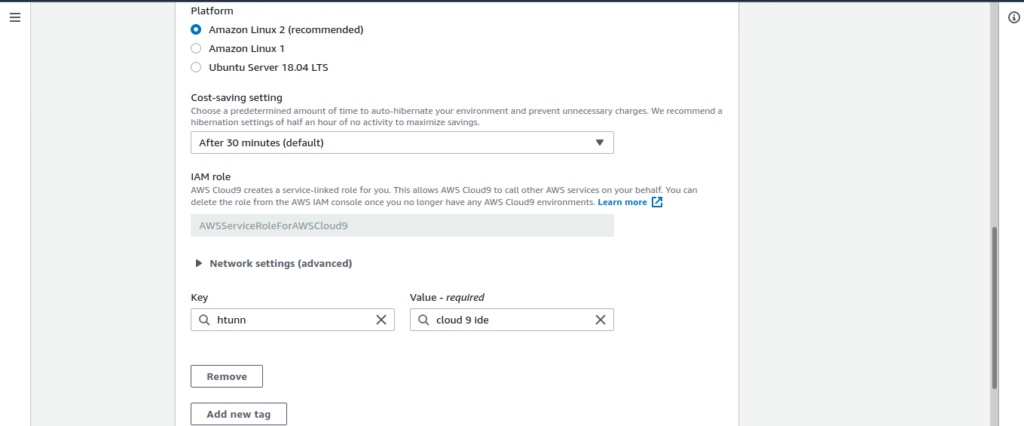
AWS Cloud9 က cost-saving အတွက်ကျွန်တော်တို့ Cloud9 IDE ကို 30 minutes မသုံးရင် EC2 instance ကို hibernate လုပ်ထားမှာပါ. hibernate time ကိုကိုယ်လိုအပ်သလိုပြင်လို့ရပါတယ်.
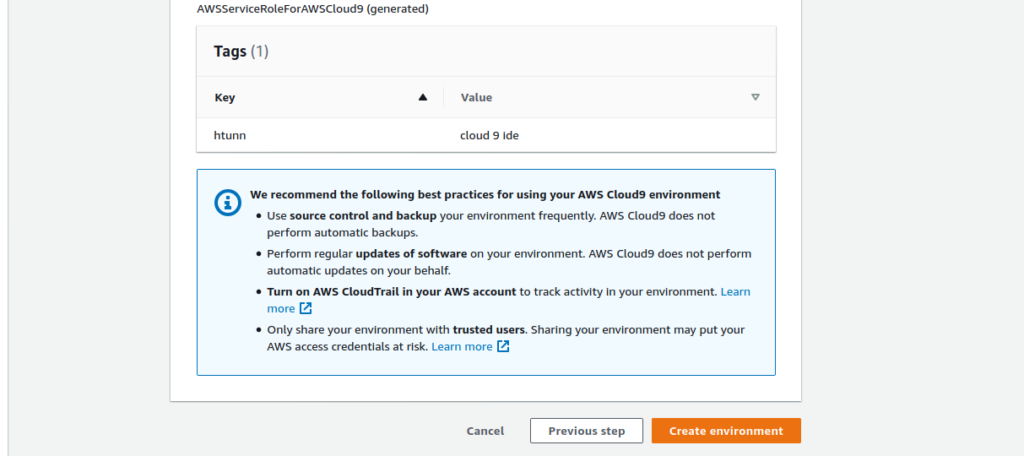
တစ်ကယ်လို့ အဆင်ပြေပြီးဆိုရင် cloud9 environment ကို create လုပ်ပါ.
ကျွန်တော်တို့ create လုပ်ထားတဲ့ cloud9 IDE ကိုစမ်းကြည့်ရအောင်.
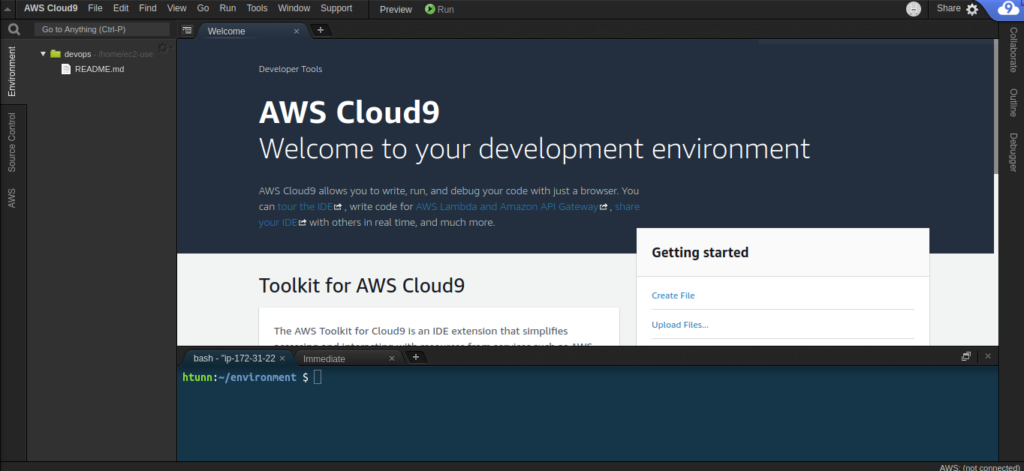
Cloud9 IDE မှာ default သက်မှတ်ထားတာတွေကို လိုအပ်ချက်ပေါ်မူတည်ပြီး ပြင်လို့ရပါတယ်. IDE ရဲ့ theme တွေကိုလဲပြောင်းလို့ရပါတယ်.
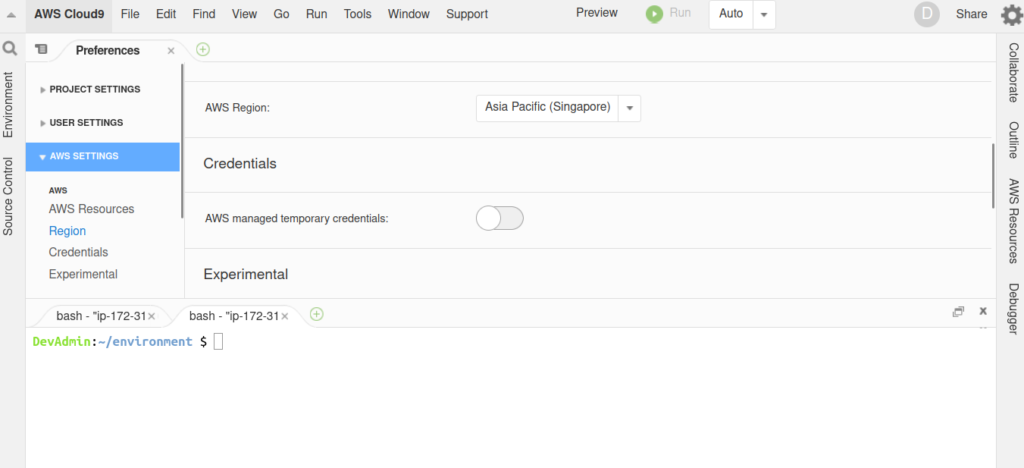
ကျွန်တော်က aws က managed လုပ်တဲ့ temporary credentials ကို disable လုပ်ထားပါတယ်.
aws managed temporary credentials ကို disable လုပ်ထားမှ EC2 instance profile and AWS CLI ( profile ) ကိုသုံးလို့ရမှာပါ.
AWS Cloud9 IDE ရဲ့ settings -> AWS SETTINGS မှာ disable လုပ်ပါ.
ကျွန်တော်တို့ aws managed temporary credentials ကို enable လုပ်ထားရင် IAM user ရဲ့ permission ကိုသုံးမှာပါ.
EC2 instance profile and AWS CLI Profile တွေကိုသုံးချင်ရင် aws managed temporary credentials ကို disable လုပ်ဖို့လိုပါတယ်.
EC2 instance profile
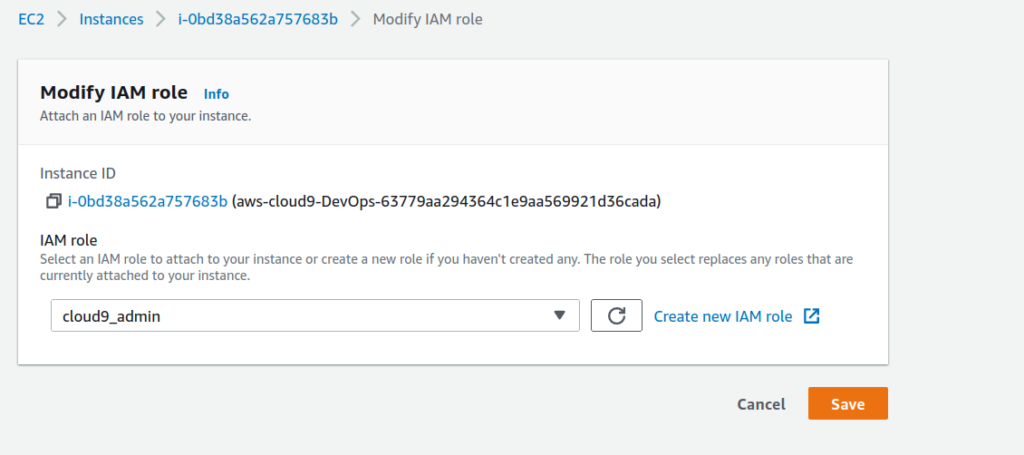
AWS Cloud9 မှာ EC2 instance profile ကိုသက်မှတ်ကြည့်ရအောင်.
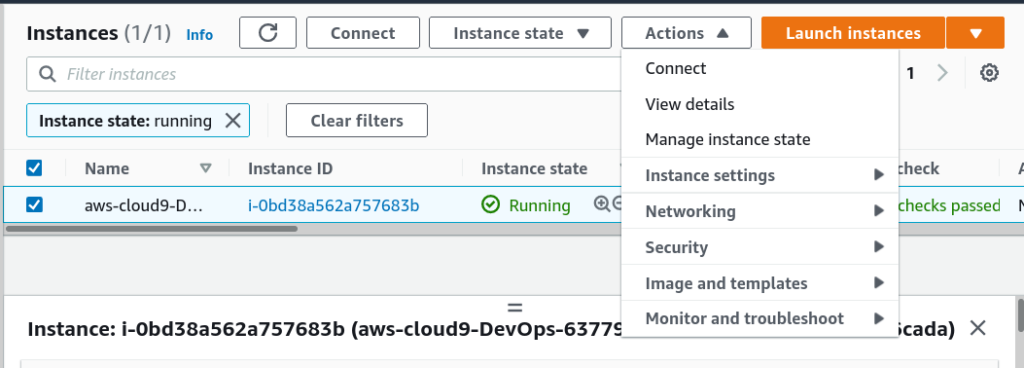
ကျွန်တော်တို့ EC2 service မှာ AWS Cloud9 instance ရဲ့ role ကိုပြင်ရမှာပါ.
EC2 instance ရဲ့ security-> Modify IAM role မှာ ပြင်ရမှာပါ.
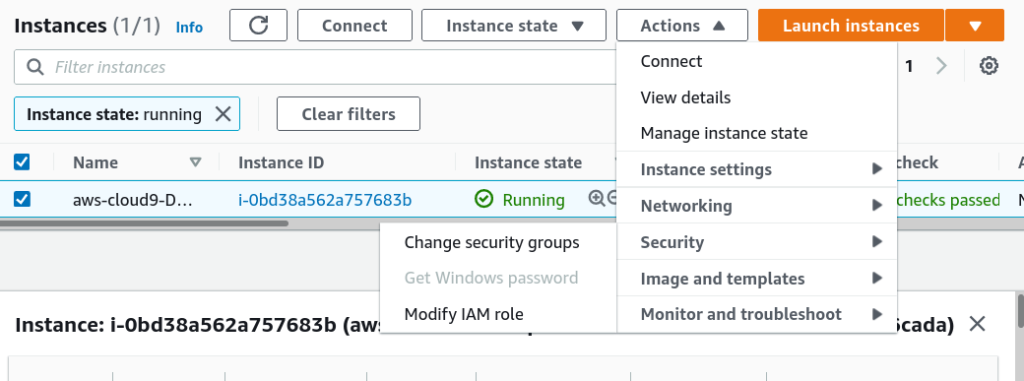
ကျွန်တော်တို့ IAM မှာ create လုပ်ထားတဲ့ EC2 instance profile ( cloud9_admin role ) ကိုသက်မှတ်ပေးပါ.
ကျွန်တော်တို့ EC2 instance profile ကိုသက်မှတ်ပြီးရင် Cloud9 IDE မှာ စမ်းကြည့်ရအောင်.
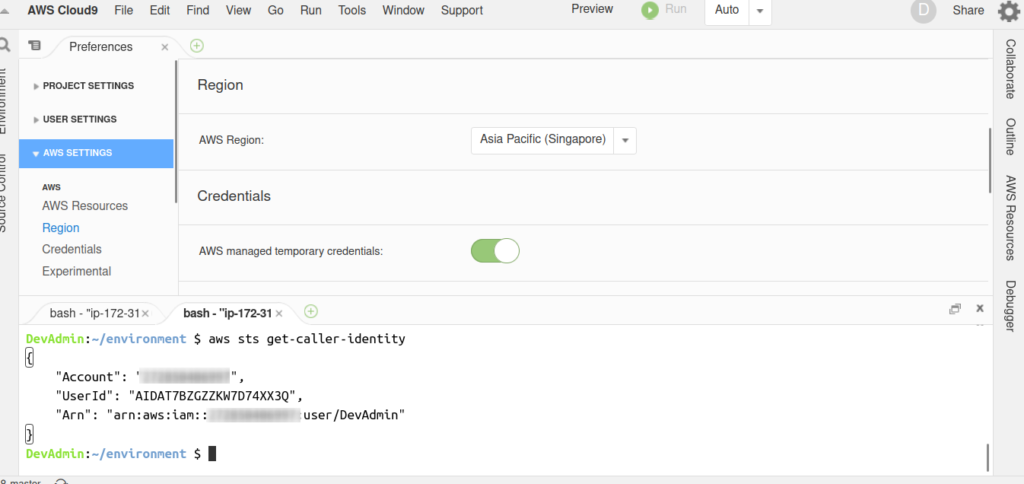
aws sts get-caller-identity 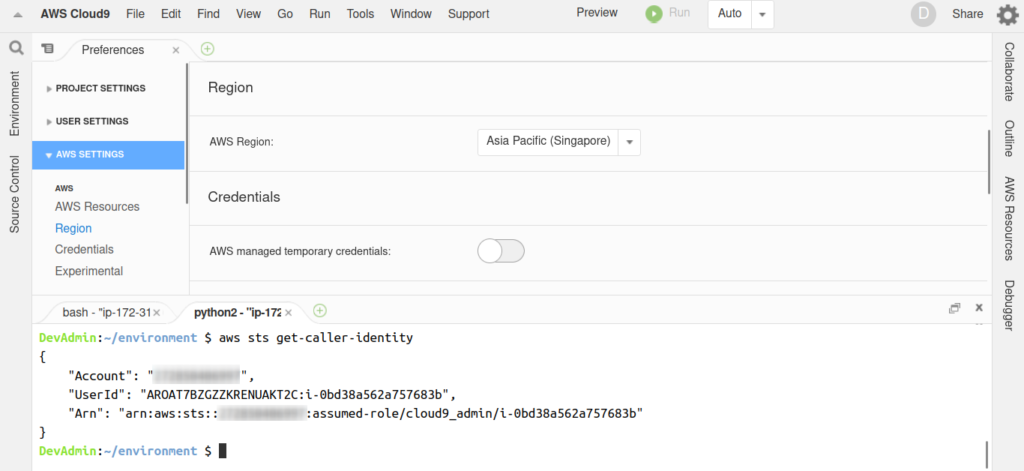
AWS CLI ကို သုံးပြီး sts ( security token service ) ကိုခေါ်ကြည့်ရင် EC2 instance profile ကိုသုံးထားတာတွေရပါမယ်.
AWS CLI ကို multiple profile နဲ့သုံးတာကိုနမူနာကြည့်ပါ.

AWS Cloud9 မှာ AWS Toolkit ကိုသုံးထားပါတယ်. AWS Toolkit ကိုသုံးပြီး ကျွန်တော်တို့ AWS Account ထဲက Resources တွေကို manage လုပ်လို့ရပါတယ်. Multiple Regions တွေကိုလဲ manage လုပ်လို့ရပါတယ်.
ကျွန်တော်တို့ AWS Toolkit ကိုမသုံးချင်ရင် disable လုပ်လို့ရပါတယ်.

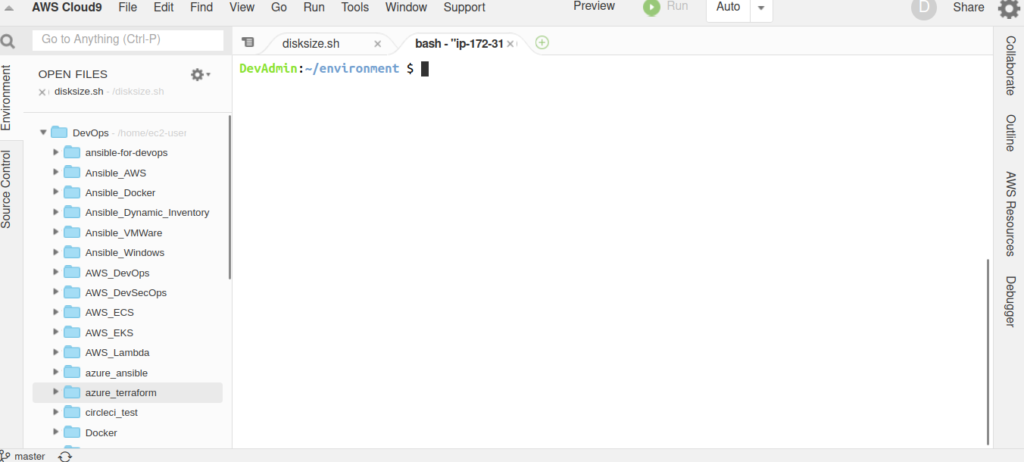
AWS Cloud9 ရဲ့ EC2 instance disk size ကနည်းပါတယ်. အောက်ပါ shell script ကိုသုံးပြီး disk size ကိုတိုးလို့ရပါတယ်.
boto3.client ရဲ့ region_name မှာ AWS Cloud9 ကိုသုံးချင်တဲ့ region ကိုပြောင်းဖို့လိုပါတယ်.
vim disk_increase.sh#!/usr/bin/bash
pip3 install --user --upgrade boto3
export instance_id=$(curl -s http://169.254.169.254/latest/meta-data/instance-id)
python -c "import boto3
import os
from botocore.exceptions import ClientError
ec2 = boto3.client('ec2', region_name='ap-southeast-1')
volume_info = ec2.describe_volumes(
Filters=[
{
'Name': 'attachment.instance-id',
'Values': [
os.getenv('instance_id')
]
}
]
)
volume_id = volume_info['Volumes'][0]['VolumeId']
try:
resize = ec2.modify_volume(
VolumeId=volume_id,
Size=30
)
print(resize)
except ClientError as e:
if e.response['Error']['Code'] == 'InvalidParameterValue':
print('ERROR MESSAGE: {}'.format(e))"
if [ $? -eq 0 ]; then
sudo reboot
fishell script ကို run ပါ.
chmod +x disk_increase.sh
. disk_increase.sh
Cloud9 EC2 instance ရဲ့ disk size ကို check လုပ်ပါ.
df -hTAWS cloud9 ပေါ်ကနေ AWS resources တွေကို manage လုပ်ရတာလဲအဆင်ပြေပါတယ်.
ကျွန်တော်က AWS Cloud9 ကို DevOps ( CI/CD, AWS Lambda and Automation, etc.. )အတွက်သုံးတာများပါတယ်.
AWS Cloud9 ကို full IDE အနေနဲ့သုံးရတာလဲအဆင်ပြေပါတယ်. AWS Cloud9 မှာအသုံးများတဲ့ programming languages တွေက default ပါပြီးတာပါ.
AWS Cloud9 မှာ source control ( git ) က ပါပြီးသာပါ.
AWS ကို Automation ( IaC and CaC ) နဲ့ manage လုပ်တာနဲ့ပါတ်သက်ပြီး ကျွန်တော်အရင်က sharing လုပ်ထားတာရှိပါတယ်.
AWS Cloud9 ကိုကျွန်တော်တို့ကြိုက်နှစ်သက်တဲ့ IDE ပုံစံအတိုင်း ပြင်လို့ရပါတယ်.အောက်ပါ link မှာကြည့်ပါ.
ဒါဆိုရင်ကျွန်တော်တို့ AWS Cloud9 ကို IDE အနေနဲ့သုံးတာအဆင်ပြေပါပြီး.
AWS Cloud9 ရဲ့ document ကို အောက်ပါ link မှာကြည့်ပါ.